
NOTE: This tutorial is for an older version of Hazel which may differ from more recent versions!
Welcome to the documentation of making your first game in Hazel! Assuming you have followed the steps in Getting Started you should have a working checkout of Hazel. Here we will learn how to make a very basic endless runner in Hazel similar in some aspects to Alto's Adventure. We will be a ball rolling down a hill avoiding obstacles and "dying" on collision.
Although we said endless, to keep the code a little bit simpler for the sake of this tutorial, we will not make it endless, but far enough for no one to get to the end.
1. Creating a new project
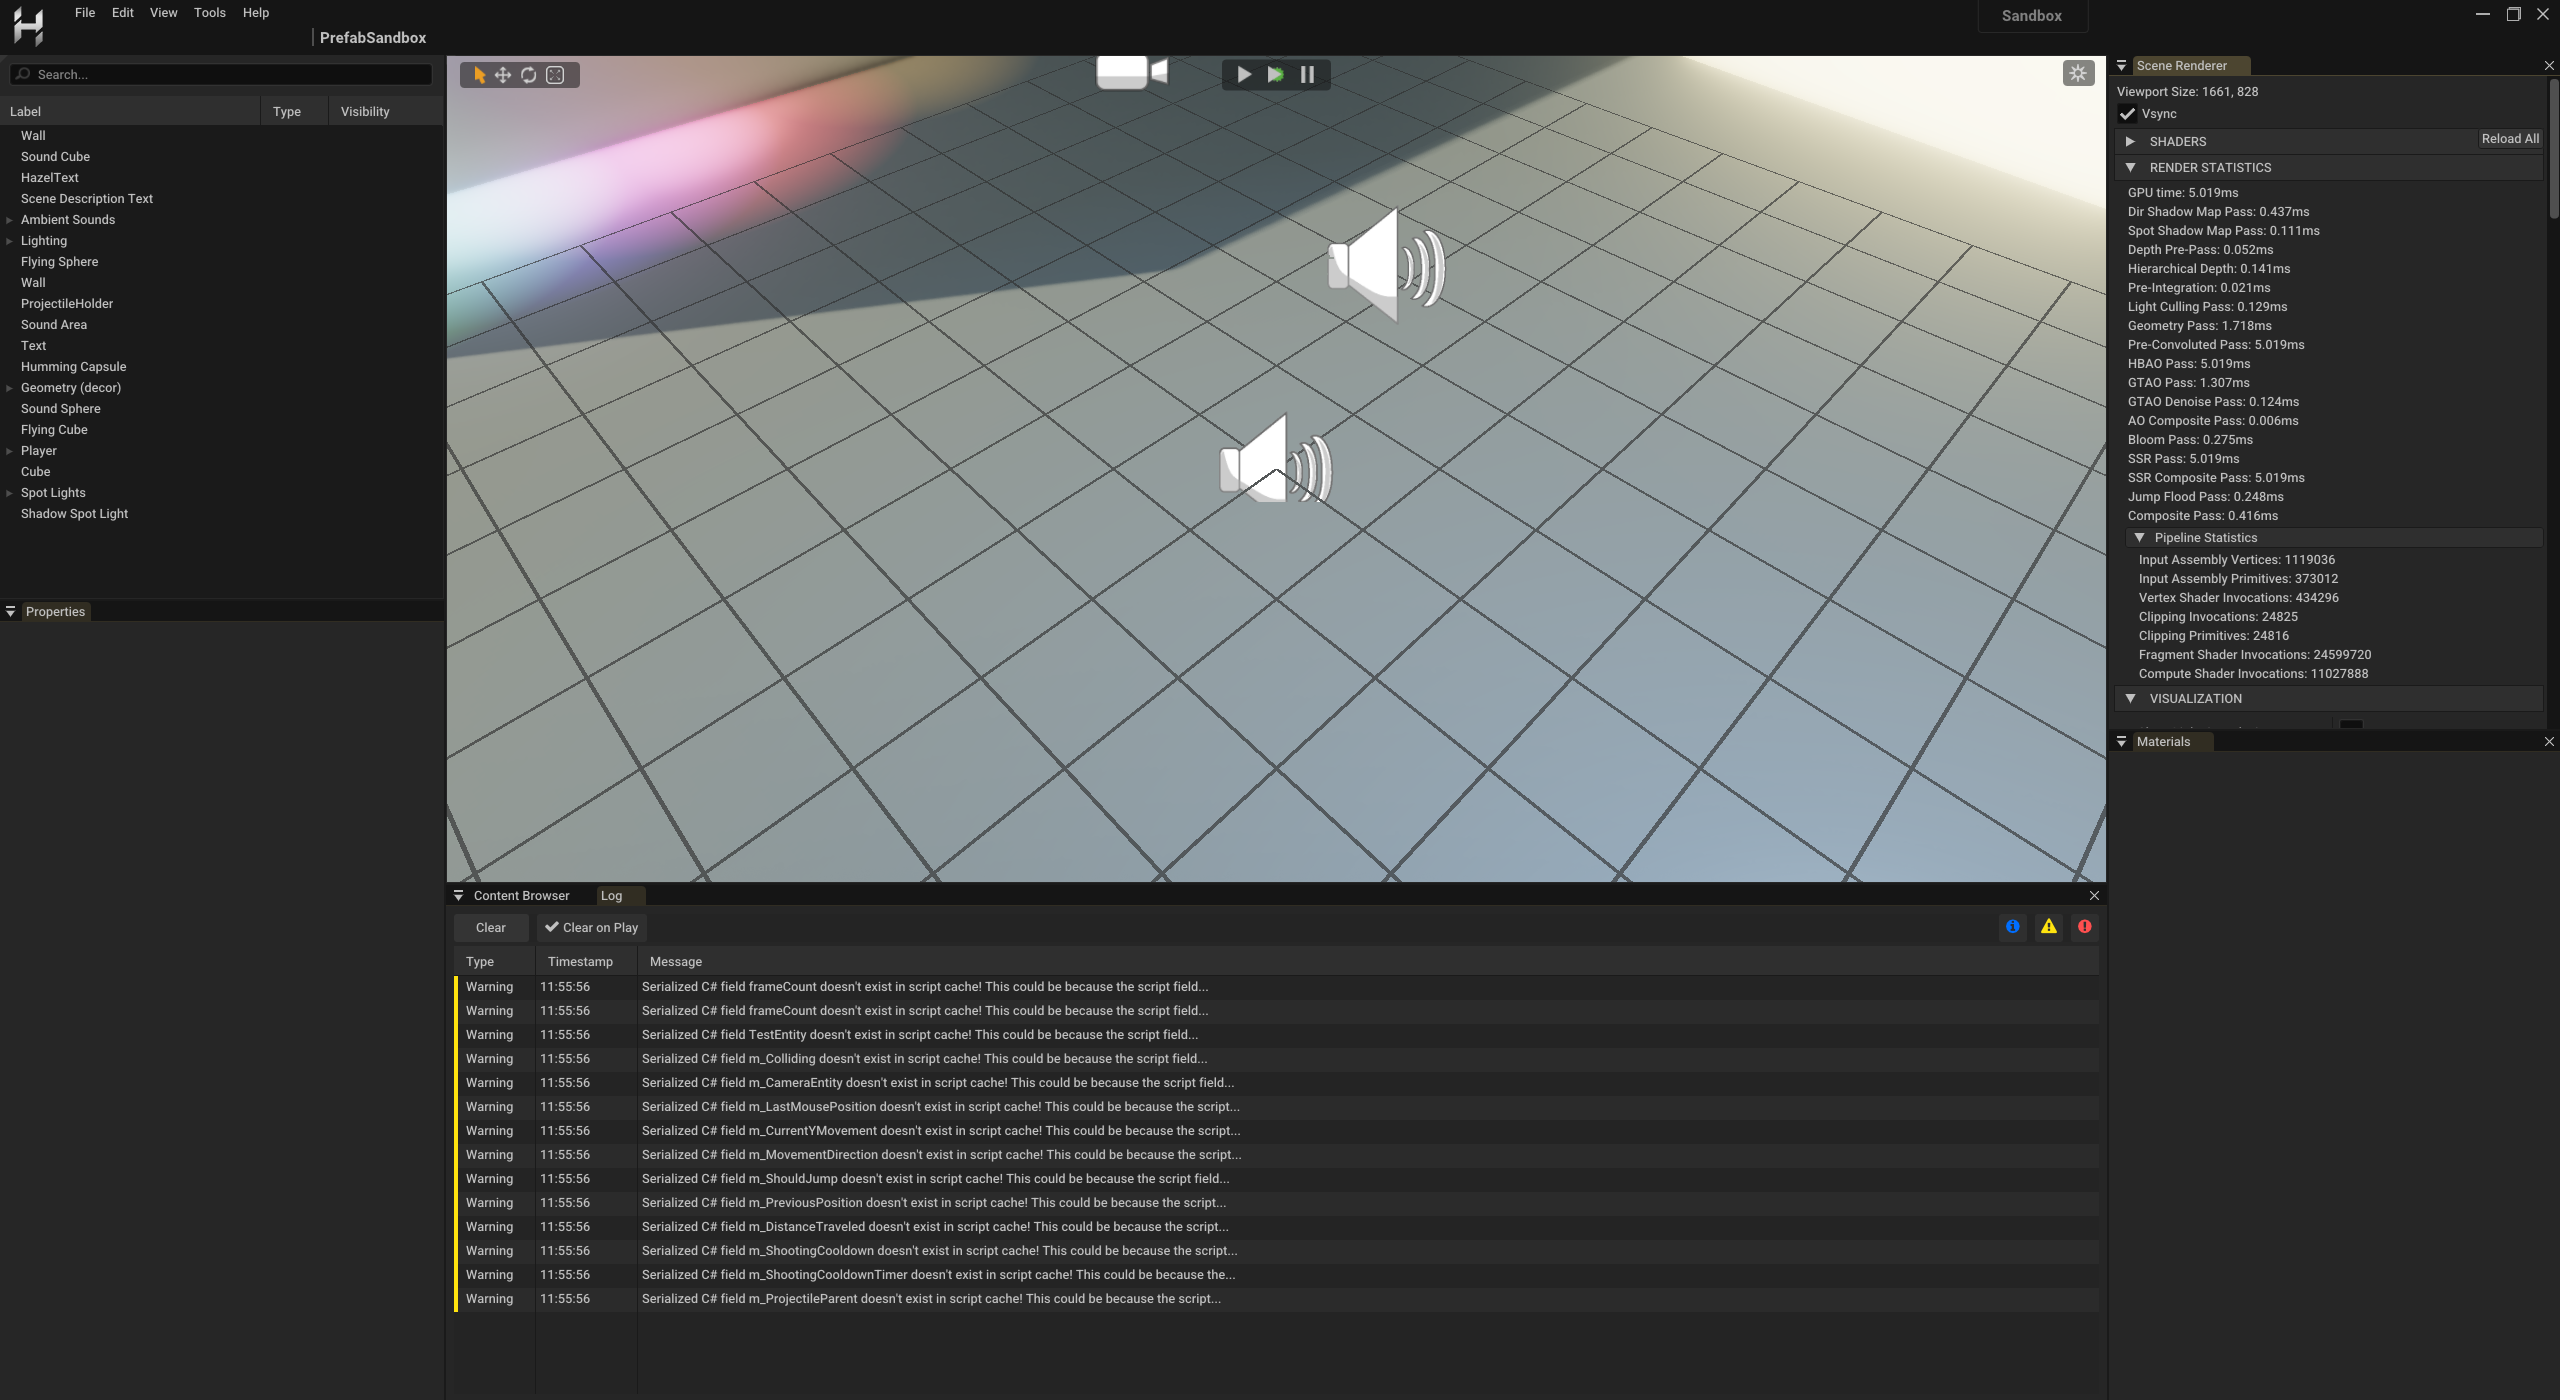
Open to the visual studio solution Hazel.sln, Build the project in Release and press F5 to run and debug the startup project, which will be Hazelnut by default. You should be greeted with the default scene of the Sandbox Project.
Navigate to File -> CreateProject (top left corner)
This should bring up the following popup:
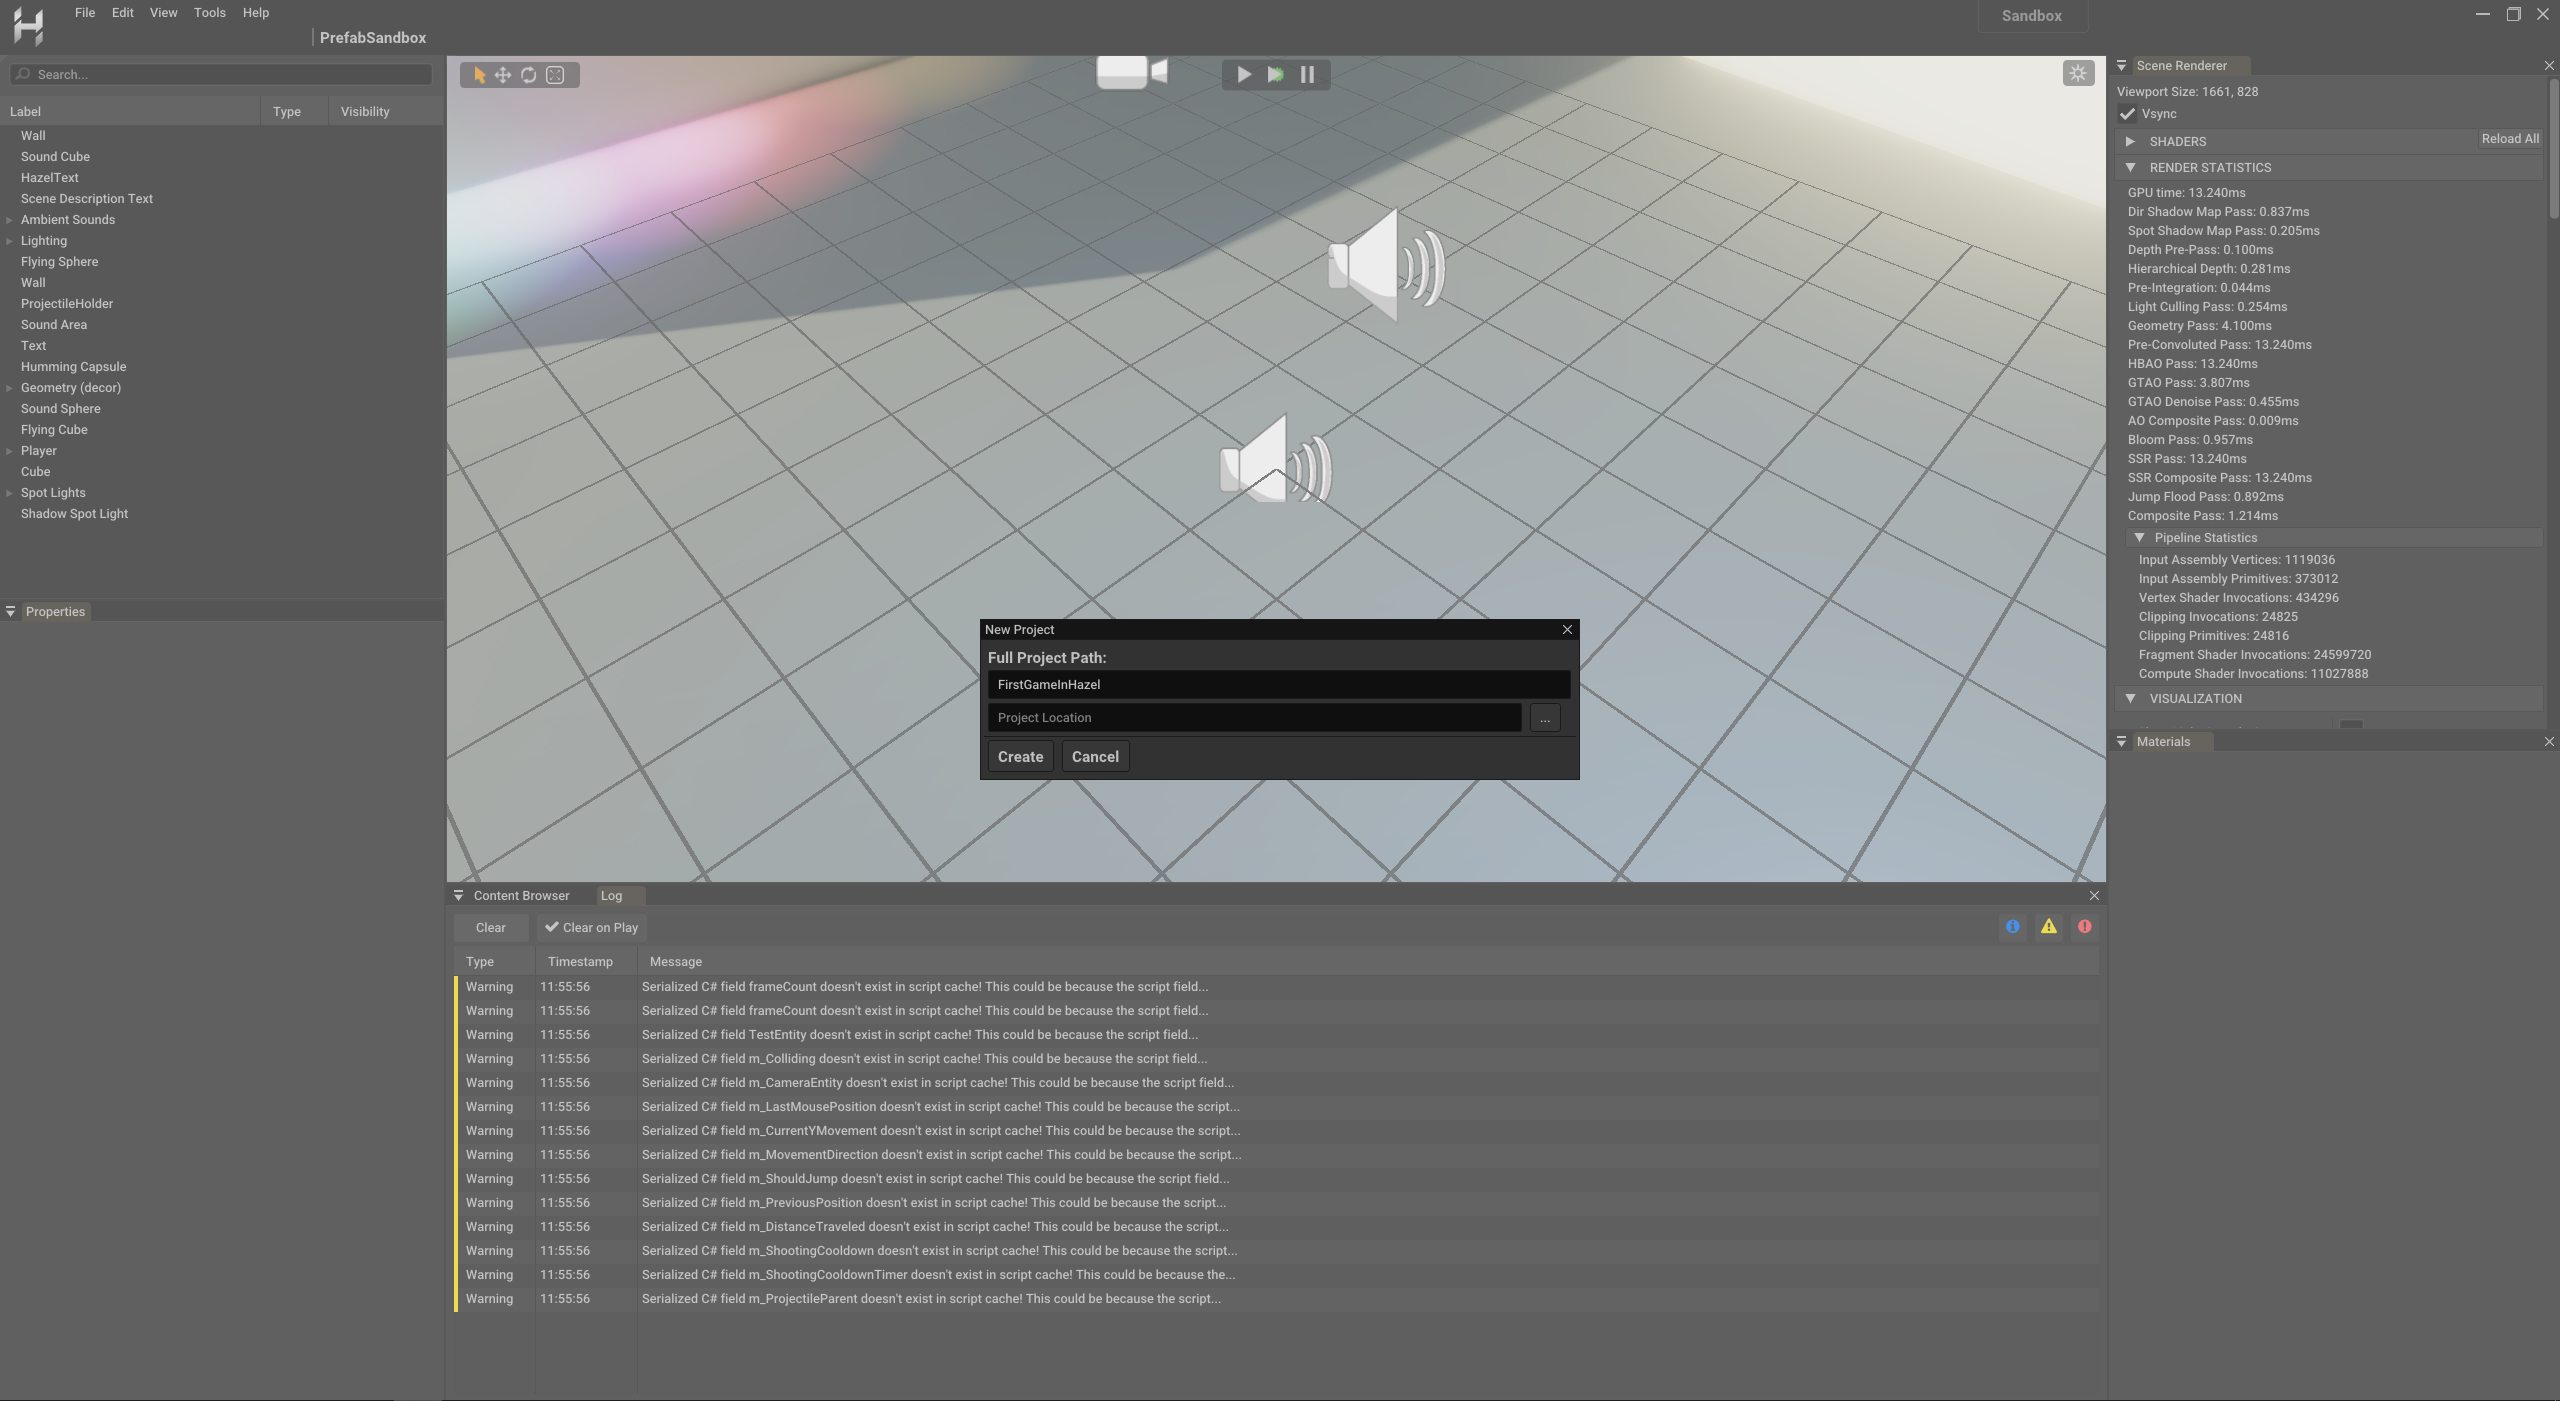
Give your project a name and specify the directory and proceed to create it, take note of the path as we will need it in the next step. Press "Create" and you should be greeted with a brand new project.
2. Setting up command line arguments
Right now we are going to set up command line arguments to make working in this project a little bit easier.
Close Hazelnut, either by navigating to File -> Exit or by simply pressing Alt+F4
-
Navigate to the already open visual studio solution
Hazel.slnand find theHazelnutproject.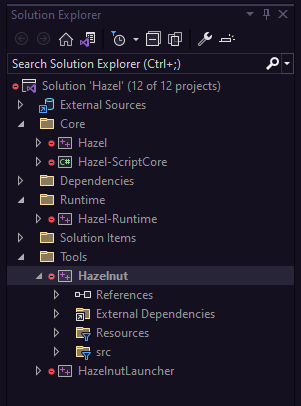
-
Select the project and press
Alt+Enterwhich will bring up the project properties -
Navigate to
Configuration Properties -> Debugging, make sure that the configuration is set toAll Configurationsand change the Command Arguments to be the path of the project we just created. IMPORTANT: Make sure to provide the absolute path to the.hprojfile.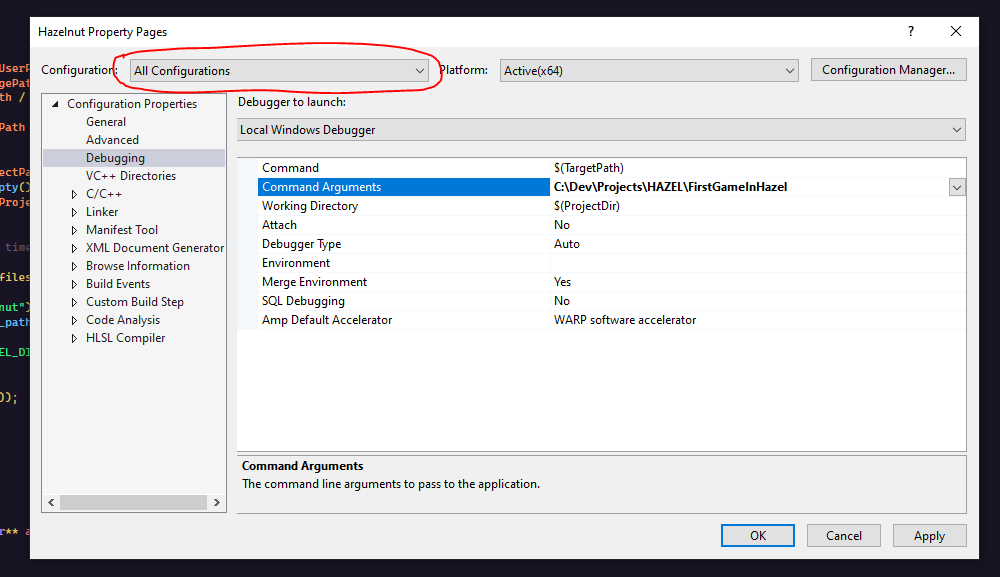
Repeat steps 1-3 for the Hazel-Runtime project as well.
3. Navigating in the Editor
Open Hazelnut, by default Hazel will now open our new project.
Before we begin making our game it would be useful for you to know how to navigate in the scene and what some of the panels that we are going to be using are called.
Editor Camera
We navigate in the scene by using the Editor Camera, to move the Camera, you must hold down Right Mouse Button, and then use W,A,S,D to move it Forward, Left, Backward and Right respectively. Use Q and E to simply modify the Y-Translation of the Camera, allowing you to ascend or descend respectively. And holding down Alt paired with the following Mouse Buttons: Left Mouse Button, Right Mouse Button, Middle Mouse Button will activate the Arcball Camera Mode: Orbit, Move, Zoom respectively. Hopefully this short description is enough to provide you with the ability to fly around your scene.
Panels
These are the different panels that will be referred to throughout this tutorial, if you ever can't find them navigate to View and make sure they are active, and if they are still not showing up where they should try clearing your imgui.ini files' docking data.


4. Setting up the scene
Now we are ready to begin creating our game! This tutorial is not meant to be a guide on how to make a Triple-A game or even anything that would be worth being published anywhere but the purpose of this tutorial is to create familiarity with Hazel as a game engine and to familiarize you with the workflow of creating, scripting and building a basic game in Hazel that would use a number of different systems.
-
You should be greeted with a very blank, dark looking scene. Save the scene, by pressing
Ctrl+Sor by navigating toFile -> Save Scene. Call the Scene "Game" -
Set the scene as the startup scene of the project by going to
Edit -> Project Settingsthis will bring up the Project Settings Panel and under General settings you should see aStartup Sceneproperty, click on it to bring up a dropdown menu and select our scene.
-
Right-Clickon the Scene Hierarchy Panel (the panel to the left) -
Create -> Sky Light -
In the Entity Properties window:
You should now be able to see a Sky Light Component
You can either import an Environment Map which is a .hdr image or do what we are going to do and
- Check the Dynamic Sky option and the scene
You can copy our Sky Light Component settings which would give you a dusk-y look
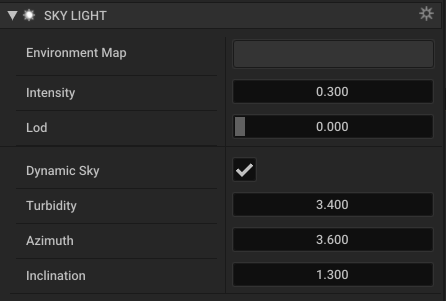
or set it up the however you would like.
5. Creating the Entities necessary for the game
Now we will set up the scene geometry, Camera, materials and all the entities that will be necessary for this game to run.
-
Right-Clickin theScene Hierarchy Panel -> Create -> 3D -> Cube. Set the Cube's transform to this:
-
Right-Clickin theScene Hierarchy Panel -> Create -> 3D -> Sphere. Set the Sphere's transform to this: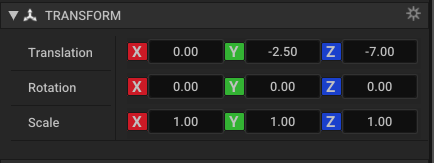
Also add a Point Light Component to the Sphere by navigating to
Entity Properties Panel -> Add -> Point Light Componentand change the settings to be the following: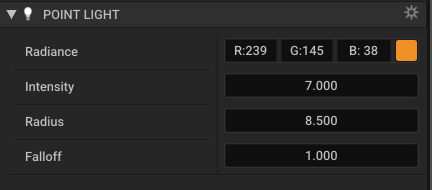
-
Right-Clickin the Scene Hierarchy Panel -> Create -> 3D -> Cone. Set the Cone's transform to this:
We will use the Cube to be our ground, Cones to be our obstacles and Sphere to be our player.
-
Right-Clickin the Scene Hierarchy Panel -> Create -> Camera -> From View Set the camera's transform to be this: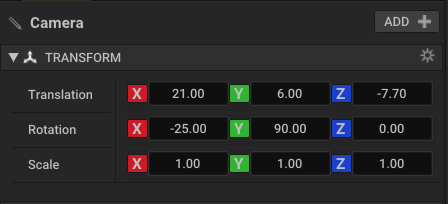
-
Create an empty entity
Right-Clickin theScene Hierarchy Panel -> Create -> Empty Entity, and call it "Spikes". We will use it to be the parent of our spikes later, just to have a slightly cleaner scene. -
Create an empty entity
Right-Clickin theScene Hierarchy Panel -> Create -> Empty Entity, and call it "Scene Controller". We will use this entity to control the scene and the game loop. Add aTextComponent to this Entity by navigating to theEntity Properties Panel -> Add -> Textand keep it at the default settings. -
In the Content Browser Navigate to the Materials Directory and create the following Materials
- Player Material - Albedo Color Code #FF881B and Emission to 4.0
- Ground Material - Albedo Color Code #000000
By this point you should have the following entities in your scene:
- Sphere
- Spikes (Empty Entity)
- Scene Controller (Empty Entity)
- Cone
- Cube
- Camera
- Sky Light
6. Assign the Materials to the Meshes
- In the Scene Hierarchy Panel and select Sphere
- In the Entity Properties Panel, under Static Mesh Component, assign our Player material by either dragging it in or by clicking on the dropdown menu.
- Rename the Sphere to "Player" by pressing
F2with the Scene Hierarchy Panel focused or by navigating to the Entity Properties Panel and clicking on the tag.
Repeat this for the Cone, and the Cube, setting their material to Ground Material and renaming them to "Spike" and "Ground" respectively.
7. Creating a simple Camera follow Script
Whenever you create a new Hazel Project or you add a C# file to an existing Project - it is usually recommended to run Win-CreateScriptProjects.bat located in the root Project Directory.
-
Open the Project's Visual Studio Solution either by navigating to the root directory and opening it or by using the editor and Clicking
Edit -> Open Visual Studio Solution -
Create a New Script by
Right Clicking on the C# Project-> Add -> New Item..., searchEntityin the search bar to the right, you should see a template script calledHazel Entity Script, select it and name itPlayerController.cs`
If you cant see the template when you search for it make sure you install the Hazel Tools extension available in Visual Studio Market Place or use this code here as a starting point instead:
using Hazel;

namespace FirstGameInHazel
{
    public class PlayerControllerScript : Entity
    {

        /// <summary>
        /// OnCreate is called once when the Entity that this script is attached to
        /// is instantiated in the scene at runtime
        /// </summary>
        protected override void OnCreate()
        {
        }

        /// <summary>
        /// OnUpdate is called once every frame while this script is active in the scene
        /// </summary>
        protected override void OnUpdate(float deltaTime)
        {
        }
    }
}
Important things to keep in mind:
- In order for the Script to be able to be picked up by the editor, the class accessibility has to be set to
public OnCreate()is called before the first frame,- If you have 30 scripts in the scene the order of execution of those scripts will be random but
OnCreate()for all of them will be called before the first frame. - Frequency of how often
OnUpdate(float ts)is called will be equal to the number of frames your machine can render per second unlessV-Syncis enabled (it is enabled by default). - If
V-Syncis enabled the number of frames is determined by the monitor's refresh rate
In order to create a simple camera follow script we will need only three lines of code, following from the template above
If you're on master then follow the code below:
using Hazel;

namespace FirstGameInHazel
{
    public class Camera : Entity
    {
        private Entity Player;

        protected override void OnUpdate(float deltaTime)
        {
            Player = FindEntityByTag("Player");
            if(Player != null)
                Translation = new Vector3(Translation.X, Player.Translation.Y + 10.0f, Player.Translation.Z - 0.7f);
        }
    }
}
And if you're on dev then follow the code below:
using Hazel;

namespace FirstGameInHazel
{
    public class Camera : Entity
    {
        private Entity Player;
        protected override void OnCreate()
        {
            Player = FindEntityByTag("Player");
        }

        protected override void OnUpdate(float deltaTime)
        {
            if(Player)
                Translation = new Vector3(Translation.X, Player.Translation.Y + 10.0f, Player.Translation.Z - 0.7f);
        }
    }
}
8. Adding Physics Bodies
Now we will add physics to our game and make the objects capable of collisions with each other! This is really simple to do and all it would require is the addition of the appropriate collider and a Rigid Body. When geometry is created in the way that we created it, Physics Colliders are added by default so all thats left to do is add a Rigid Body to all of them, simply:
-
Select all three entities (Player, Spike and Ground),
-
Navigate to the
Entity Properties Panel -> Add -> Rigid BodyThis will add a Rigid Body to each Entity.
-
Click Player and set it's Rigid Body from
StatictoDynamicsince we want this body to be influenced by Gravity and other Forces.Changing the body type of the Rigid Body will bring up more settings, we want to change a couple:
Under Constraints we want to
- Freeze Position X, since the game that we are making is essentially going to be in 2D.
- Freeze XYZ Rotations.
-
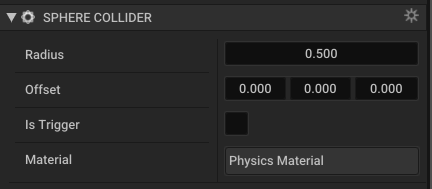
Create a Physics material by going to the
Content Browser Panel -> Materials -> Right-Click -> New -> Physics -> Physics Material -
Double-Clickto open it and change theStatic FrictionProperty to0.1andDynamic FrictionProperty to0.4
-
Assign this material to both the Ground and the Player's Physics Colliders' Material Property
Now if you have followed the steps up until now, you should upon playing your scene see a rolling ball
9. Duplicating the Spike Entity
Parent our spike entity to our Spikes entity, by dragging the former onto the latter in Scene Hierarchy Panel. Having done that select the Spike Entity and press Ctrl + D four times. Now the Spikes entity should be the parent to five Spike Entities, all of which contain a Static Rigid Body and a Collider. All that's left is to position them along our Ground and this step will be done!
10. Create a Player Controller Script
Important things to keep in mind:
- In order for the Script to be able to be picked up by the editor, the class accessibility has to be set to
public OnCreate()is called before the first frame,- If you have 30 scripts in the scene the order of execution of those scripts will be random but
OnCreate()for all of them will be called before the first frame. - Frequency of how often
OnUpdate(float ts)is called will be equal to the number of frames your machine can render per second unlessV-Syncis enabled (it is enabled by default). - If
V-Syncis enabled the number of frames is determined by the monitor's refresh rate
Using the template as a starting point we will now add some basic behavior to the player
using Hazel;

namespace FirstGameInHazel
{
    public class PlayerControllerScript : Entity
    {
        private RigidBodyComponent m_Rb;
        private bool m_ShouldJump;
        private float m_JumpForce = 16.0f;

        protected override void OnCreate()
        {
            m_Rb = GetComponent<RigidBodyComponent>(); // The rigid body component that's on our player
            m_Rb.MaxLinearVelocity = 18.0f; // Setting a maximum velocity so that our player won't endlessly increase their speed.
        }

        protected override void OnUpdate(float deltaTime)
        {
            m_Rb.MaxLinearVelocity = Mathf.Clamp(m_Rb.MaxLinearVelocity + 0.01f, 0.0f, 25.0f); // Slowly increasing the players max speed.

            if(IsGrounded()) // Only get the jump input if the player is currently on the ground.
            {
                GetInput();
                if(m_ShouldJump) // If space has been pressed this frame - jump
                    m_Rb.AddForce(new Vector3(0.0f, 1.0f, -25.0f / 90.0f).Normalized() * m_JumpForce, ForceMode.Impulse); // Adding a force to the RB.
            }
            else
            {
                m_Rb.AddForce(Vector3.Down * m_JumpForce / 15.0f, ForceMode.Impulse); // if the player has jumped, add a heavier gravity
            }
            m_ShouldJump = false; // Should jump is only true for one frame because we do not want to apply the force every frame.
        }

        private void GetInput()
        {
            if(Input.IsKeyDown(KeyCode.Space))
                m_ShouldJump = true;
        }

        bool IsGrounded()
        {
            // Raycast(origin, direction, maxDistance, hit)
            return Physics.Raycast(Translation + new Vector3(0.0f, -1.0f, 1.0f) * 0.51f, new Vector3(0.0f, -1.0f, 1.0f), 0.01f, out RaycastHit hitInfo);
        }
    }
}
11. Create Scene Controller Script
Now we will create a Script that will be responsible for making our game run, by moving the obstacles forward, and completing our game loop.
If you're on master then follow the code below:
using Hazel;

namespace FirstGameInHazel
{
    public class SceneController : Entity
    {
        public Entity[] Spikes;
        private Entity Player;

        private int m_FurthestSpikeIndex;
        private float m_AngleOfGround;

        private TextComponent m_Tc;

        protected override void OnCreate()
        {
            m_Tc = GetComponent<TextComponent>();
            m_FurthestSpikeIndex = 4;
            Player = FindEntityByTag("Player");
            m_AngleOfGround = FindEntityByTag("Ground").GetComponent<RigidBodyComponent>().Rotation.X;
        }

        Transform m_PlayerTransform;

        protected override void OnUpdate(float deltaTime)
        {
            Player = FindEntityByTag("Player");
            if(Player != null)
            {
                MoveSpikes();
                m_PlayerTransform = Player.Transform.WorldTransform;
            }
        }

        private void MoveSpikes()
        {
            for(int i = 0; i < Spikes.Length; i++)
            {
                if (Spikes[i] == null)
                    continue;

                if (Spikes[i].Translation.Z > Player.Translation.Z && Mathf.Abs(Spikes[i].Translation.Z - Player.Translation.Z) > 26.0f)
                {
                    float currentFurthestSpikeZ = Spikes[m_FurthestSpikeIndex].Translation.Z;
                    float offset = Hazel.Random.Float() * -6.0f - 7.0f;
                    float newZ = currentFurthestSpikeZ + offset;

                    float newY = (float)Math.Tan(m_AngleOfGround) * newZ; // Trigonometric way of figuring out the new Y location Tan(theta) = Opp / Adj

                    m_FurthestSpikeIndex = i;
                    Spikes[i].Translation = new Vector3(Spikes[i].Translation.X, -newY, newZ);
                }

            }
        }
    }
}
And if you're on dev then follow the code below:
using Hazel;

namespace FirstGameInHazel
{
    public class SceneController : Entity
    {
        public Entity[] Spikes;
        private Entity Player;

        private int m_FurthestSpikeIndex;
        private float m_AngleOfGround;

        private TextComponent m_Tc;

        protected override void OnCreate()
        {
            m_Tc = GetComponent<TextComponent>();
            m_FurthestSpikeIndex = 4;
            Player = FindEntityByTag("Player");
            m_AngleOfGround = FindEntityByTag("Ground").GetComponent<RigidBodyComponent>().Rotation.X;
        }

        Transform m_PlayerTransform;

        protected override void OnUpdate(float deltaTime)
        {
            if(Player)
            {
                MoveSpikes();
                m_PlayerTransform = Player.Transform.WorldTransform;
            }
        }

        private void MoveSpikes()
        {
            for(int i = 0; i < Spikes.Length; i++)
            {
                if (Spikes[i] == null)
                    continue;

                if (Spikes[i].Translation.Z > Player.Translation.Z && Mathf.Abs(Spikes[i].Translation.Z - Player.Translation.Z) > 26.0f)
                {
                    float currentFurthestSpikeZ = Spikes[m_FurthestSpikeIndex].Translation.Z;
                    float offset = Hazel.Random.Float() * -6.0f - 7.0f;
                    float newZ = currentFurthestSpikeZ + offset;

                    float newY = Mathf.Tan(m_AngleOfGround) * newZ; // Trigonometric way of figuring out the new Y location Tan(theta) = Opp / Adj

                    m_FurthestSpikeIndex = i;
                    Spikes[i].Translation = new Vector3(Spikes[i].Translation.X, -newY, newZ);
                }
            }
        }
    }
}
As you can see that in the first line of the class, we have a public Entity Array, within Hazelnut we need to expand the count of the array to 5 and place each of our spikes in the array, by dragging it from the Scene Hierarchy Panel into the property reference on the Script. Make sure to drag the furthest spike into the last index of the array as the script behavior depends on that
This script also assumes that the Spikes are already rotated correctly as it won't modify the spikes translation in any way.
At this point you should have an endless runner!
12. Adding Collision Functionality and Finishing the Game Loop
At this point, you have a player that will jump, and roll over the spikes (sometimes), we need to know when the player is colliding in order to kill the player and restart the round.
In order to do that we will set a Collision Callback in the Player Script, this will be the function that gets called the moment we collide with something.
This is quiet simple to do:
Change the OnCreate() function to be the following and add the functions OnCollisionBegin and GameOver()
protected override void OnCreate()
{
    m_Rb = GetComponent<RigidBodyComponent>(); // The rigid body component that's on our player
    m_Rb.MaxLinearVelocity = 18.0f; // Setting a maximum velocity so that our player won't endlessly increase their speed.

    CollisionBeginEvent += OnCollisionBegin; // Setting a collision callback, a function that will run every time we collide with something.
}

private void OnCollisionBegin(Entity other)
{
    if(other.Tag == "Spike")
        GameOver();
}

private void GameOver()
{
    Destroy(this); // Destroying our player.
}
And in the Scene Controller Script we would have to provide a way of restarting the game in the OnUpdate(float deltaTime) function append an else branch to the if statement
protected override void OnUpdate(float deltaTime)
{
    ...
    else // If the player is dead proceed with the game loop.
    {
        Translation = m_PlayerTransform.Position + Vector3.Up * 5.0f;
        Rotation = m_PlayerTransform.Rotation + Vector3.Up * Mathf.PI / 2.0f;

        m_Tc.Text = "Game Over\nPress Enter to Play Again!";
        if(Input.IsKeyPressed(KeyCode.Enter))
            SceneManager.LoadScene("Scenes/Game.hscene");
    }
}
So now if our player is no longer valid, because it has been destroyed in our PlayerController script, the Scene Controller Script will present the option to restart the game and will reload the scene upon the pressing of the Enter Key.
13. Creating Prefabs in Hazel
Now we will create a simple death effect by Instantiating some small Spheres on the Player's death. So let's learn how to create prefabs.
-
Navigate to the
Scene Hierarchy Panel ->Right-Click-> Create -> 3D -> Sphere -
Add a Dynamic Rigid Body to the Player
-
Create a New Material and Assign it to the Static Mesh Component, I've set mine to have the Albedo color of
#FF0000but feel free to create your own material. -
When you have finished Editing your entity, Create a new directory in the Content Browser and Name it "Prefabs".
-
Drag the Entity from the Scene Hierarchy Panel into the directory and you should now have a prefab.
If you notice the prefab in the scene will be blue in color, if it is ever red that means that the prefab reference broke, learn how to fix broken prefabs here.
14. Instantiating Prefabs
This is quiet simple to do, just like public Entity will create a publicly settable Entity in Hazelnut, a public Prefab will do the same for prefabs.
So having dragged in our Particle into the field we will be ready to Instantiate them upon death!
So in our player script we need the following changes:
    public class PlayerControllerScript : Entity
    {
        public Prefab Particle;

        ...

        private void GameOver()
        {
            for(int i = 0; i < 20; i++) // Instantiating some particles.
            {
                Vector3 scale = Scale * 0.4f * Random.Float(); // Randomizing the scale between Vector3(0.0f) and Vector3(0.4f)
                Vector3 translation = Translation + Random.Float() * Vector3.One; // Randomizing translation slightly between Vector3.One and Vector3.Zero
                Transform transform = new Transform(translation, Vector3.Zero, scale); // Creating a new Transform
                Instantiate(Particle, transform); // Instantiating a prefab with a Transform
            }

            Destroy(this); // Destroying our player.
        }
        ...
    }
This Script will now Instantiate 20 Particles on the Player's death.
15. Keeping Score
Lets provide some visual feedback on how the player is doing, by keeping track of the distance that the player has traveled and displaying it.
-
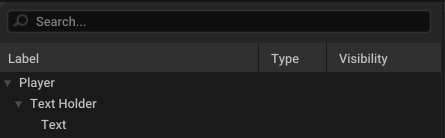
Add a Child entity to the player and name it TextHolder and add a child to that entity and name it Text. You should have the following Hierarchy:
-
Change the Transform of the Text Holder to this:

-
Add a Text Component to the "Text" Entity, Write some dummy data in there like 10,000. Setting it's transform to this:

-
Now in the Player Controller Script add a
public Entity TextEntityand assign that to be our "Text" Entity in Hazelnut. -
Add scripting behavior to Player Controller Script:
public class PlayerControllerScript : Entity
{
    public Prefab Particle;
    public Entity TextEntity;

    private TextComponent m_Tc;
    private RigidBodyComponent m_Rb;
    private bool m_ShouldJump;
    private float m_JumpForce = 16.0f;

    protected override void OnCreate()
    {
        m_Rb = GetComponent<RigidBodyComponent>(); // The rigid body component that's on our player
        m_Rb.MaxLinearVelocity = 18.0f; // Setting a maximum velocity so that our player won't endlessly increase their speed.

        m_Tc = TextEntity.GetComponent<TextComponent>(); // Getting the Text Component.

        CollisionBeginEvent += OnCollisionBegin; // Setting a collision callback, a function that will run every time we collide with something.
    }

    ...

    protected override void OnUpdate(float deltaTime)
    {
        m_Tc.Text = Mathf.CeilToInt(Mathf.Abs(Translation.Z)).ToString() + " m"; // Setting the player's score, not showing the decimal points;

        ...
With this we now have a Text displaying the meters we've traveled!
16. Adding Audio
We will now learn the workflow for adding audio in Hazel which is a very necessary part to every game you're going to create!
We will not be creating anything too complicated and just have the following sounds in the game:
- Jump Sound
- Death Sound
- Soundtrack
First things first we need the .wav or .ogg files, .ogg being recommended due to it's smaller size. At the moment Hazel doesn't support .mp3 files.
For sound effects I will use bfxr, and for the Soundtrack I will use this Royalty Free track by Denis Maksimov.
In the Content Browser within the "Audio" directory I prefer to usually make a "Source" directory where I save my .ogg and .wav files.
-
In the "Audio" directory
Right-Click -> Audio -> Sound Config -
Create and name one of these for each Audio file you have, in my case its 3.
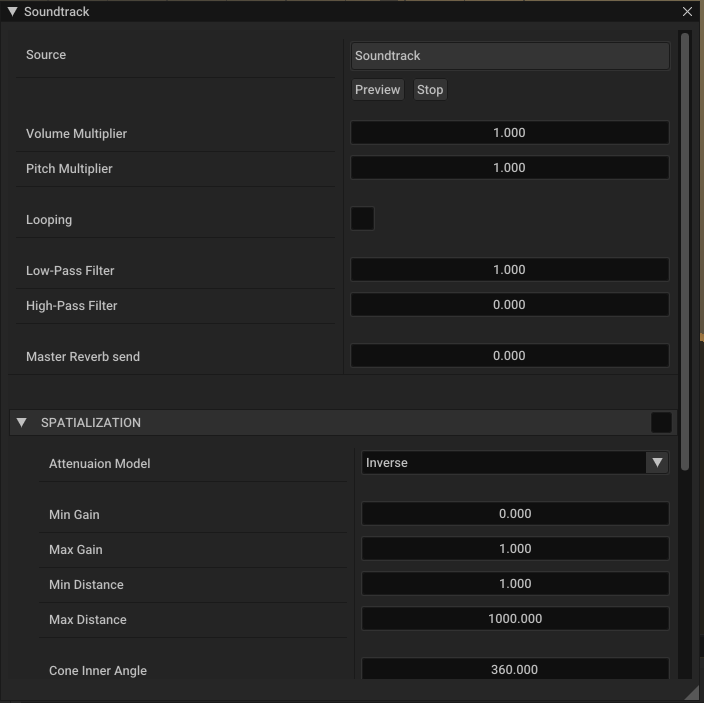
-
Double-Clickon each Sound Config and assign the source audio to be the appropriate one.For the Soundtrack Sound Config make sure to check the "Looping" checkbox.
-
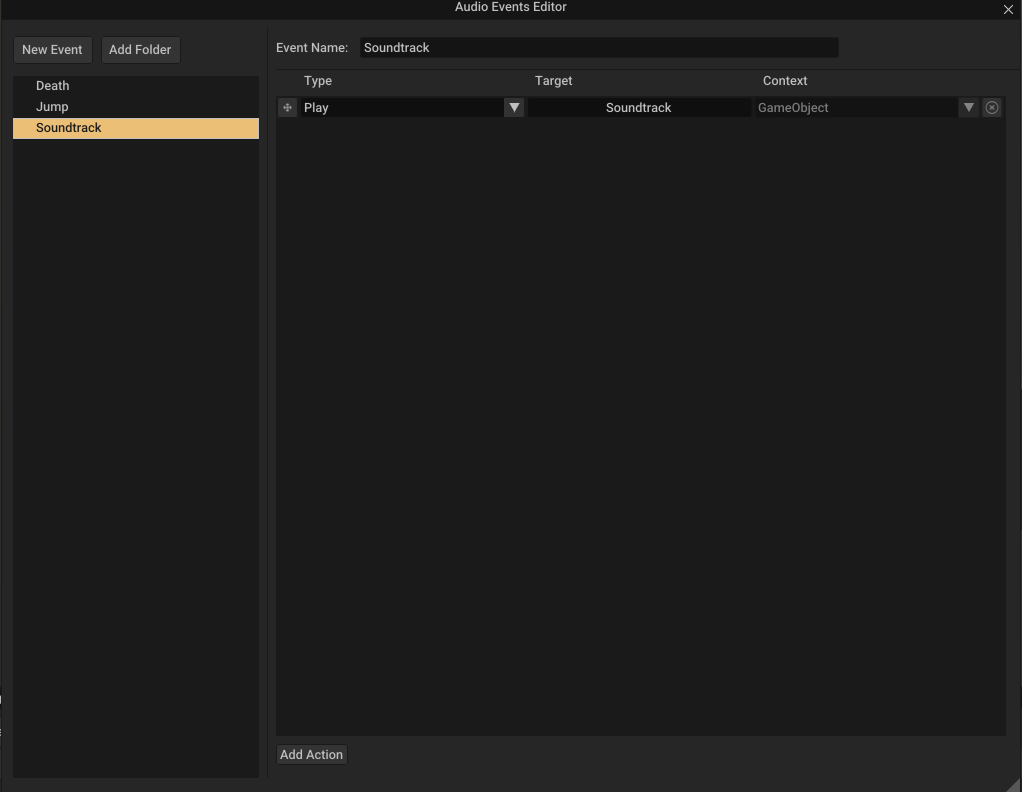
Open the Audio Events Editor by navigating to
Edit -> Audio Events -
Create a Play Event for each SoundConfig name it {SoundConfigName}, Adding the Play Action and Setting the correct config;
-
In the Scene Hierarchy Panel add Audio Components to the SceneController and Player Entities.
- In the Player's Audio Component un-check the "Stop When Entity Is Destroyed" checkbox
- Set the SceneController's Start Event in the Audio Component to be the Soundtrack Event and check the "Play on Awake" checkbox

-
Add an Audio Listener Component to the Camera.
With the Camera selected Navigate to
Entity Properties Panel -> Add -> Audio Events Listener -
Build the Sound Bank!
Navigate to -> File -> Build Sound Bank -
Open the Player Controller Script in Visual Studio
public class PlayerControllerScript : Entity
{
    public Prefab Particle;
    public Entity TextEntity;

    private AudioComponent m_Audio;

    ...

    protected override void OnCreate()
    {
        m_Audio = GetComponent<AudioComponent>();
        ...
    }

    private void GameOver()
    {
        ...

        m_Audio.SetEvent("Death");
        m_Audio.Play();

        Destroy(this); // Destroying our player.
    }

    protected override void OnUpdate(float deltaTime)
    {
        ...

        if(IsGrounded()) // Only get the jump input if the player is currently on the ground.
        {
            GetInput();
            if(m_ShouldJump)
            {
                // If space has been pressed this frame - jump
                m_Rb.AddForce(new Vector3(0.0f, 1.0f, -25.0f / 90.0f).Normalized() * m_JumpForce, ForceMode.Impulse);
                m_Audio.SetEvent("Jump");
                m_Audio.Play();
            }
        }
        ...
    }
With this the audio should be working! And now we are ready to build our game!
17. Building the Game
See The Runtime and Shipping Your Game
