
When animating make sure that all the animation data is on the bone. No object transform data will be seen in Hazel. This example will be making a simple one bone animation, the principle will not change for more bones.
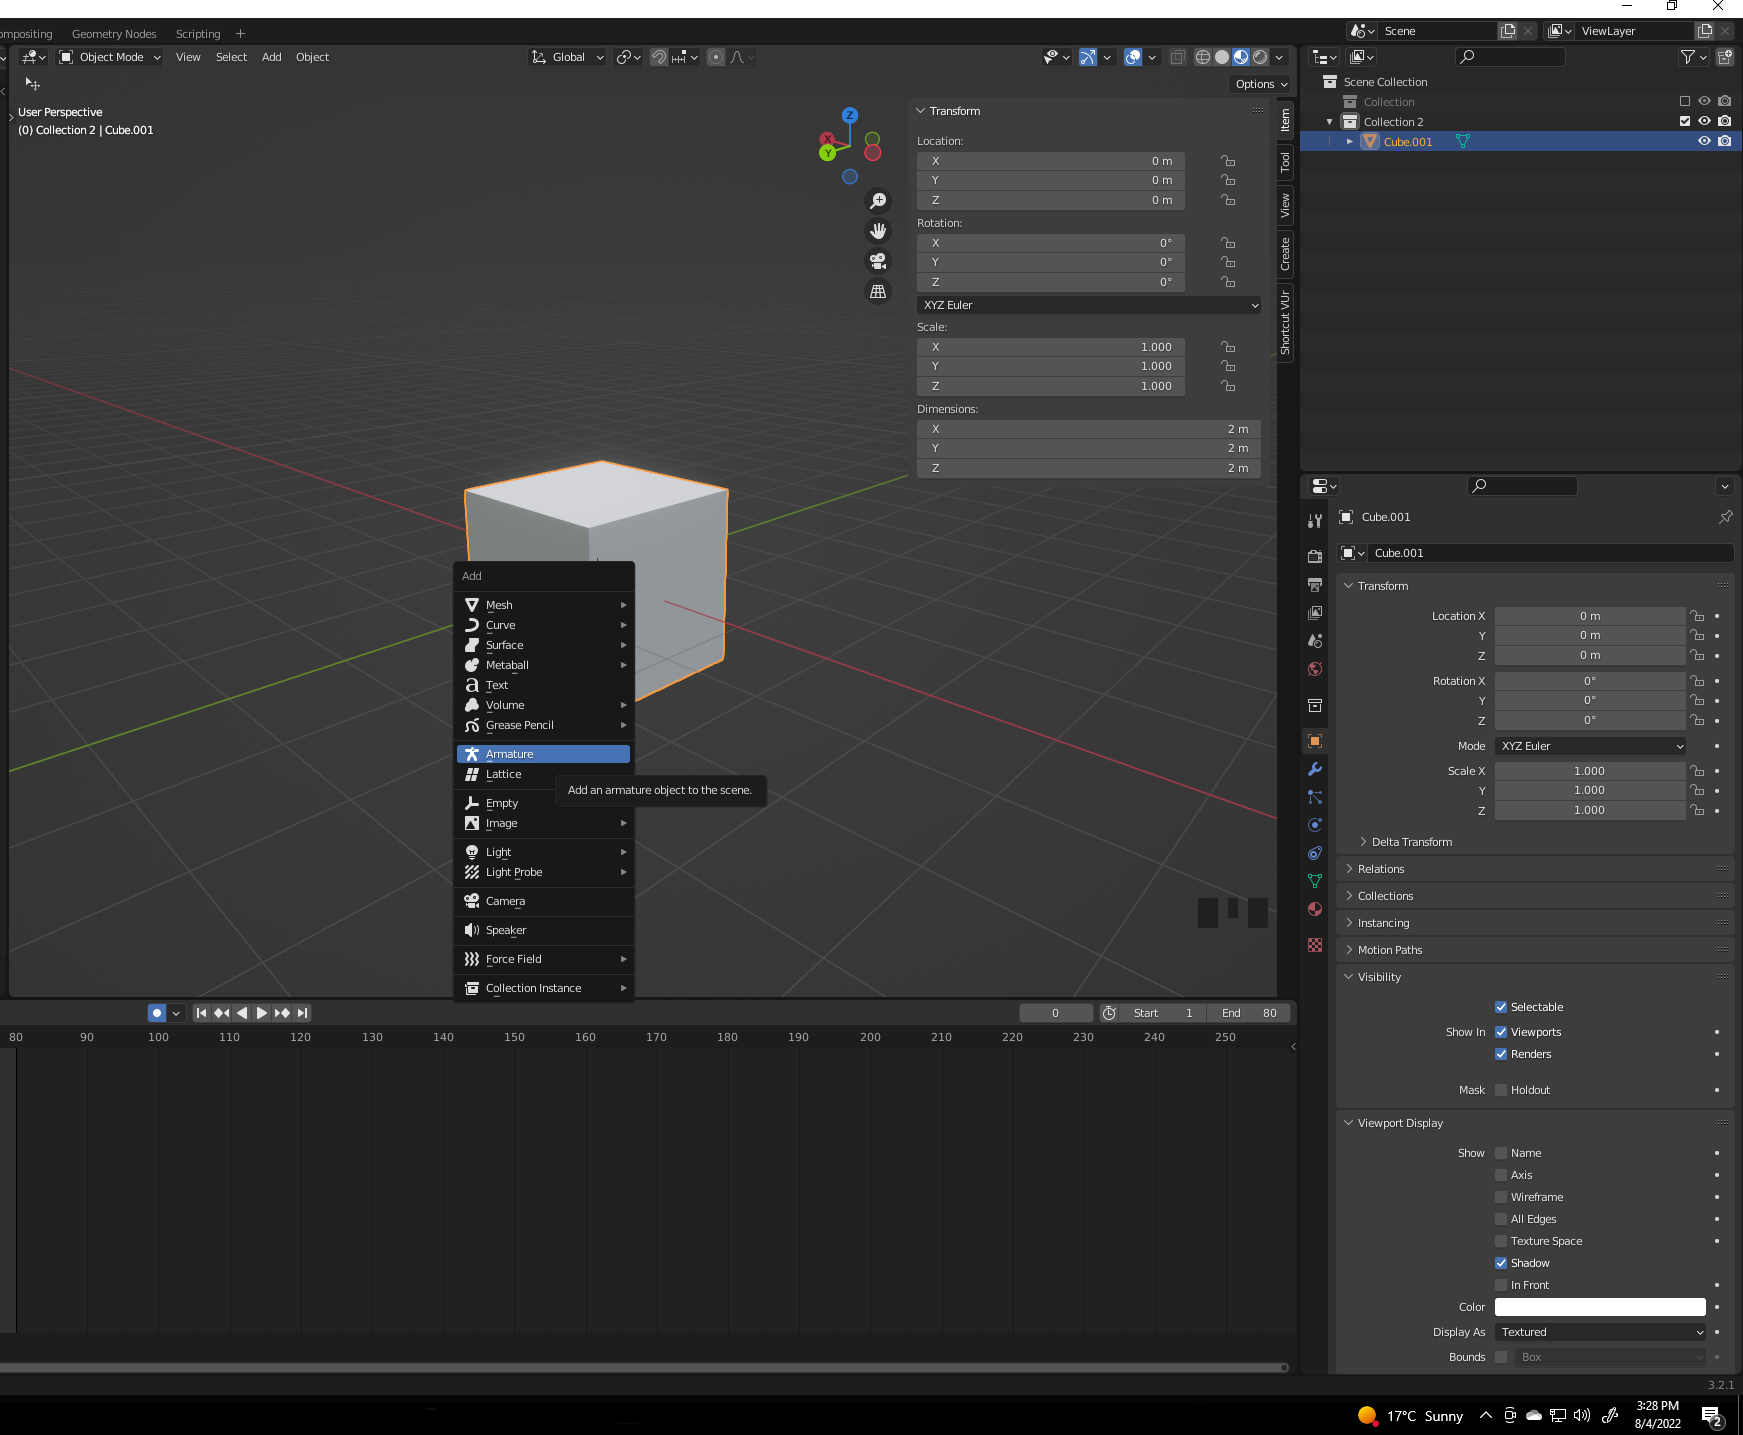
1. Create an armature
Shift + A -> Armature
2. Bones Visibility
Make bones visible with the “in front” property Navigate to Object Data Properties (Stickman Figure) -> Viewport Display -> Check the In Front property
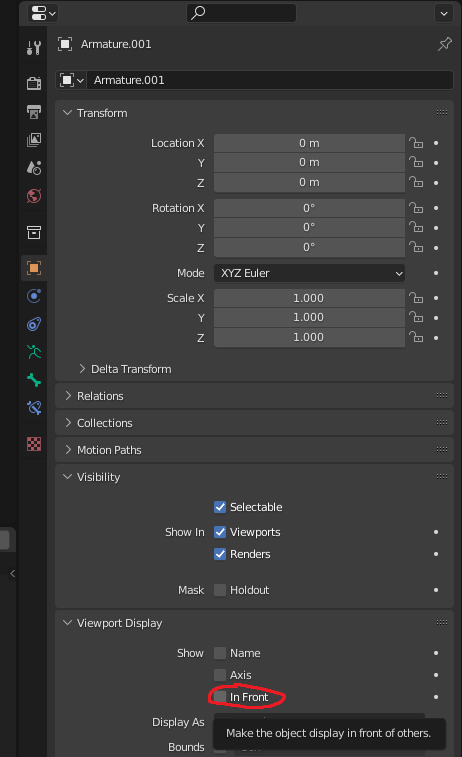
Should you need further help on this step you can find it here.
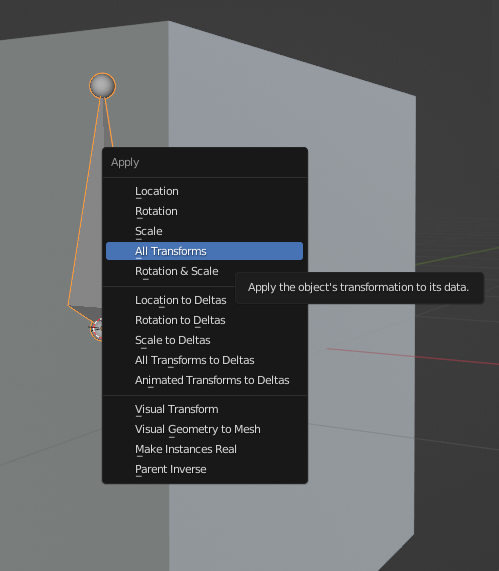
3. Apply All Transforms
Make sure that you have applied all transforms (CTRL-A in Object Mode) to the bone and the object, preferably parent the bone to the object and animate at World Origin in Blender. In our case since this is a brand new cube and armature there is no offset from World Origin. Failing to do this can result in funky results when importing to Hazel.
4. Parent the mesh
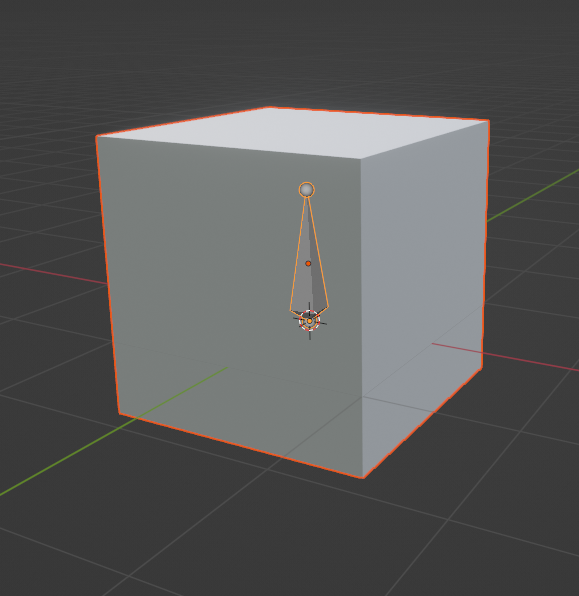
Parent the mesh to the armature, make sure armature is selected last, like in the image below it will have a light orange outline.

5. Weight Painting
Automatic weight painting can often be wrong on models with more bones and geometry. Repainting may need to be done to achieve better results. Blender's tools aren't exactly the best for that at times. In our case of a single bone automatic weight painting works perfectly since the single bone is responsible for 100% of the geometry’s movement.
6. You are ready to start animating!
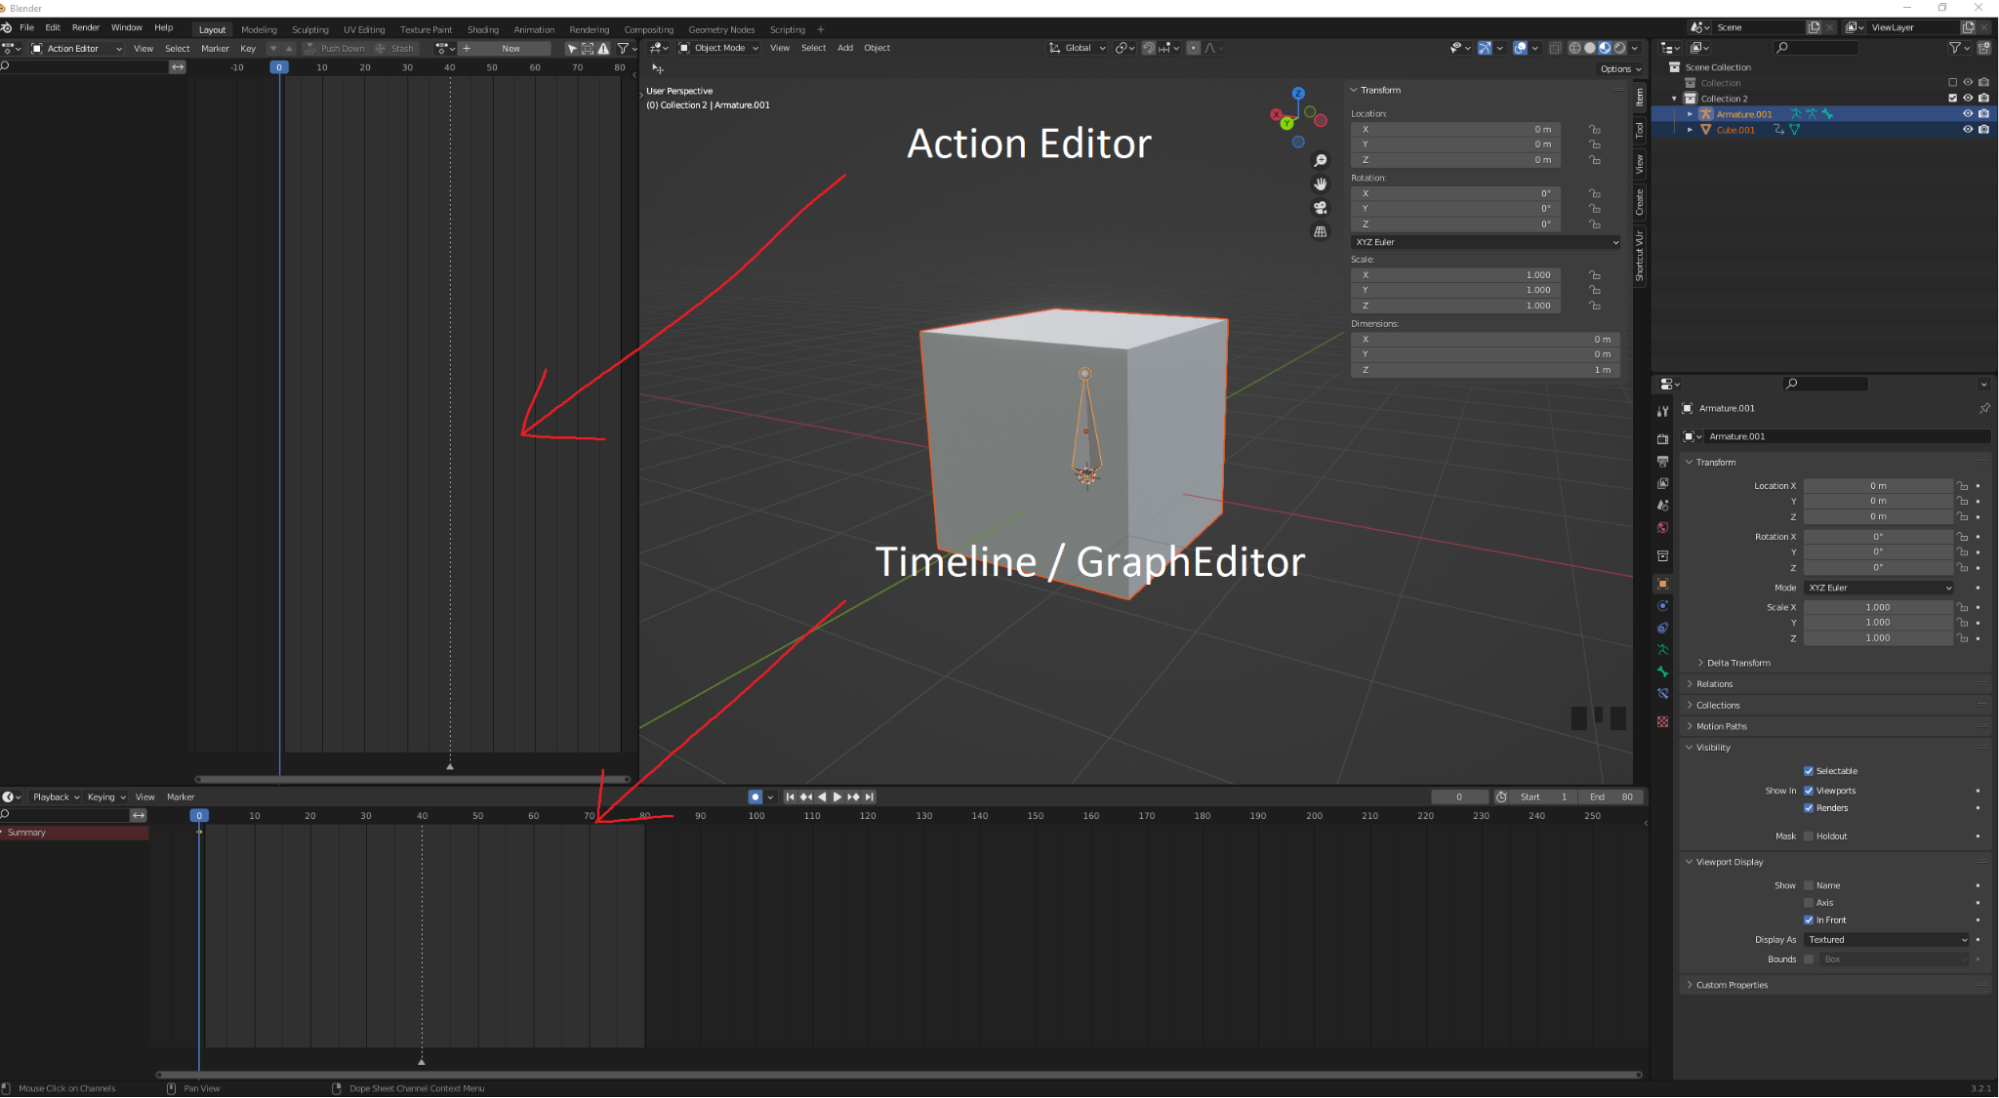
I like to have my viewport set up the following way in order to be able to visualize actions on one view and the timeline or graph editor on the other.
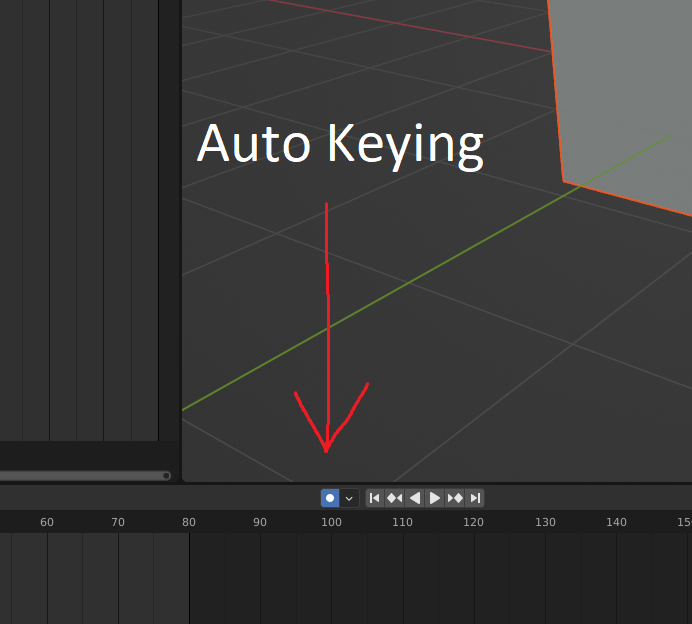
7. Animate the object
Now it's time to Animate the object by going to Pose Mode (make sure to select the bone otherwise it won’t show up)
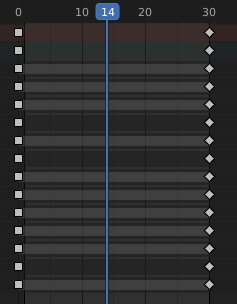
a. If you’re finding that the animation doesn’t happen in a linear fashion change the handle type of the keyframes, do this by selecting the entire keyframe (right clicking the topmost track), then Handle type, then Vector.
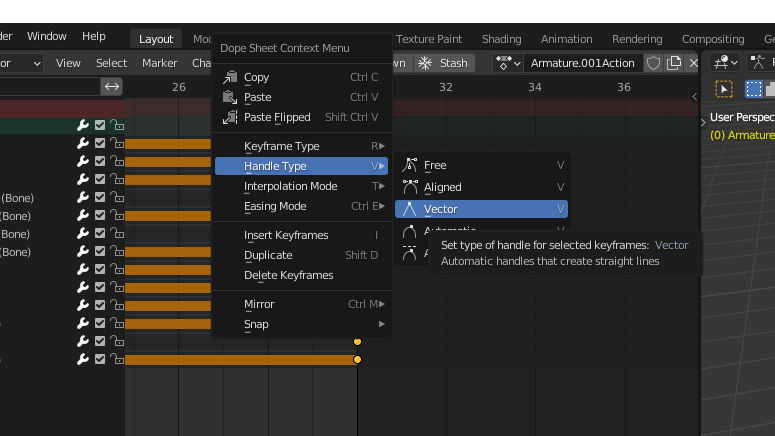
By default keyframes are circular shapes, there are kite / rhombus shapes which signifies a ‘free’ handle type, that can be edited in the graph view, a vector handle type will be a square keyframe, in the image below the first is a ‘Vector Handle Type’ Keyframe and the second is a ‘Free Handle Type’.
b. By default Blender's animation settings are in Quaternions which for any normal human being would be difficult to understand to change the animation rotation type navigate to the “N” menu. NOTE: The animation will still be using quaternions internally, it will just be more "readable" in Euler angles.
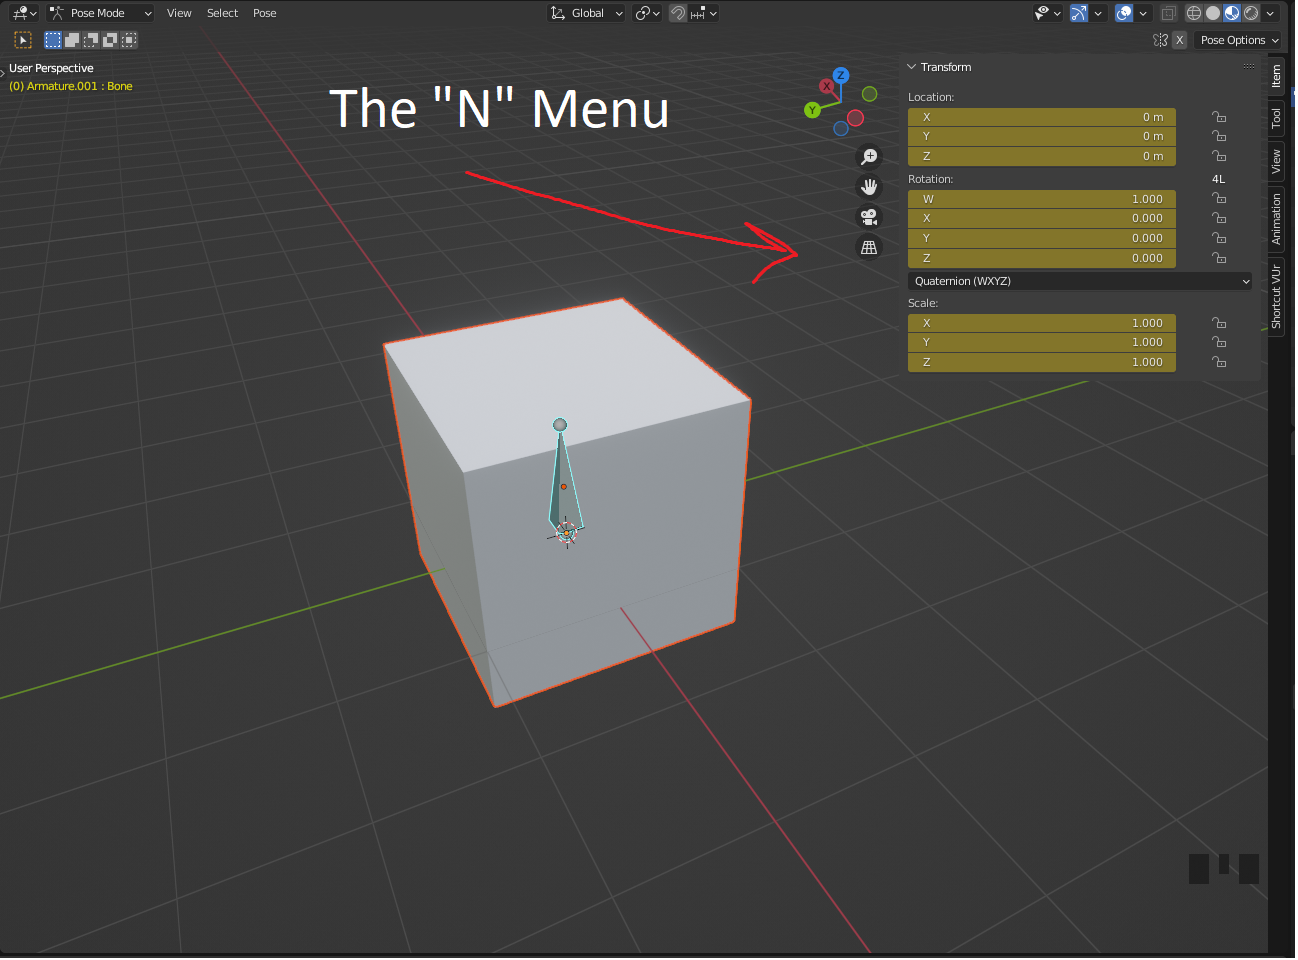
If it’s not visible you can hit “N” on your keyboard or navigate to the “item” section on the side bar. Then simply change the rotation in the dropdown menu from Quaternion to one of the many Euler options. Make sure to do this before starting your animation since these Euler animation tracks would need to be re-added to every single keyframe
c. Multiple different animations on a single mesh can be achieved by creating different actions in Blender, unfortunately sometimes not all actions get exported correctly so where out of three different animations only two will actually make it into Hazel unfortunately this happens quite often. My work around to make sure that this is less likely is by:
-
i. Making sure that Fake User is active on all the actions. That’s the little shield icon near the action name.
-
ii. Deleting redundant actions - this is somewhat tricky to do but this post can help with figuring it out.
-
iii. In the worst case scenario, creating a new Blender file and appending the armature, mesh and all the actions, checking each action individually and then exporting to Hazel. Appending allows you to bring data from one Blender project to another in a very Blender friendly way which is 100% non-damaging of your data in any way.
d. One again make sure none of your animation is an ‘Object transform’ since that movement data will not be visible in Hazel. This can show up in several ways, one if you moved the bone in object mode and two if you animated the mesh instead of the bone, below are screenshots of both those scenarios
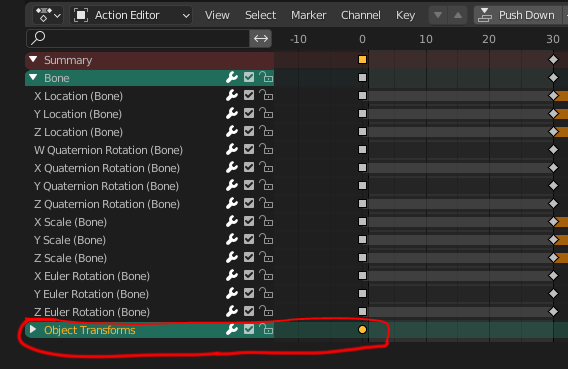
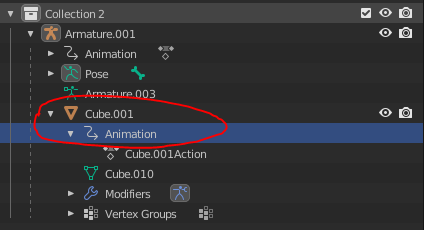
Just make sure to delete those tracks if they’re not empty, I prefer to delete them anyway just to make sure I am always animating the bone and not the object.
8. Exporting the animation:
If you have a large scene in blender make sure to export only parts of it that you intend to export. Blender allows you to do this in several ways. I usually use ‘Selected Objects’ under Limit To and make sure to Select all the objects in the Scene Hierarchy Panel. My preferred format for exporting is the glTF Binary (.glb) since it doesn’t create multiple files like the glTF Separate.
NOTE: Hazel doesn't really support glTF Embedded so avoid exporting as that one.
-
Under Transform tab keep the default settings
-
Under Geometry tab keep the default settings
-
Under Animation tab keep the default settings
Save the file to your project directory.
9. Importing to Hazel
Import like a normal mesh by dragging into the scene, but this time make sure that you import as Dynamic Mesh and all the options below are selected as well, the only optional one being Generate Colliders. That one is recommended to be turned off, as there have been problems with it on occasion.
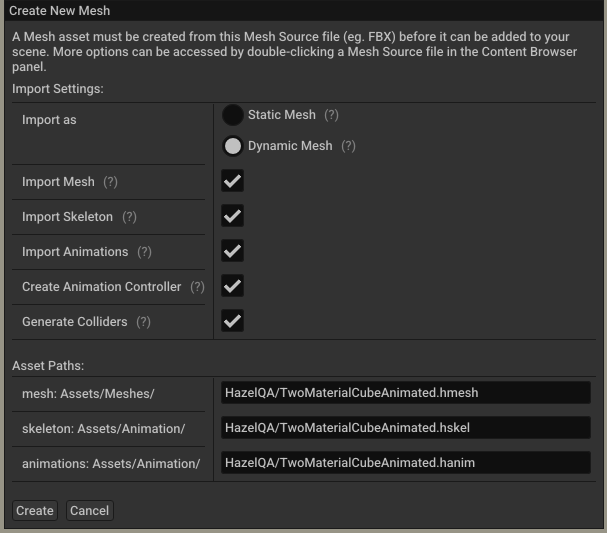
NOTE: Hazel will likely change how it imports assets in the future, so step 9 may look different sometime soon.